


A couple of months ago, I wrote an article on how to learn the free-standing handstand. Now we are taking it a step further. I will show you how to achieve the almighty Handstand push-up. This advanced bodyweight skill requires a lot of strength and balance. It will take a lot of time before you are able to perform this move. Fortunately, I made a tutorial especially for those people who want to learn the handstand push-up. And no, they are not impossible. You can learn it too(at home)!
7-Day Free Trial Included
Get it here:

Why you should learn the handstand push-up
The free-standing handstand push-up is, besides, badass-looking, the best bodyweight shoulder exercise, in my opinion. The exercise not only ensures extremely strong shoulders, but it also trains your balance, which can be useful for other drills. Your core is also very involved in this. In other words, the handstand push-up can be seen as a full-body skill. A perfect exercise if you want to have complete control over your body.
Requirements and warm-up
Before you start training, there are a number of requirements that you must meet in any case. These requirements are there to prevent injuries, and believe me, that will happen if you start training the handstand push up without any preparations. At first, I suggest you a solid free-standing handstand for at least 10 seconds. Next, you need a base-pushing strength in your shoulders. Make sure you are able to do at least thirty push-ups. Lastly, you need healthy shoulders. You can’t have any injuries. But this speaks for its leaves. If you meet all criteria, you are ready to train the handstand push-up!
How to learn the handstand push-up at home
Now, I will tell you how I managed to learn the handstand push-up at home. It is my method, and it worked really well for me. It took me about two months to go from a free-standing handstand to doing a couple of reps of handstand push-ups. The only thing you need is a strong wall with some space. The training approach is quite simple.
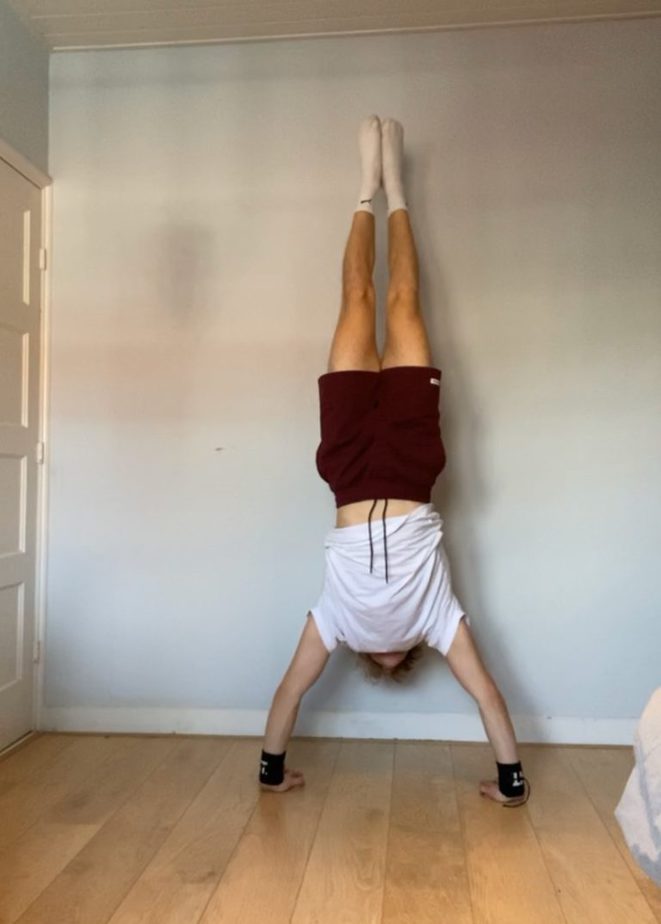
The first step is to hold the handstand against the wall and try to do a handstand push-up. The handstand push up is so difficult because there is a lot of balance in addition to strength. By doing handstand push-ups against the wall, you don’t have to focus on the balance aspect. This way, it will be so much easier.
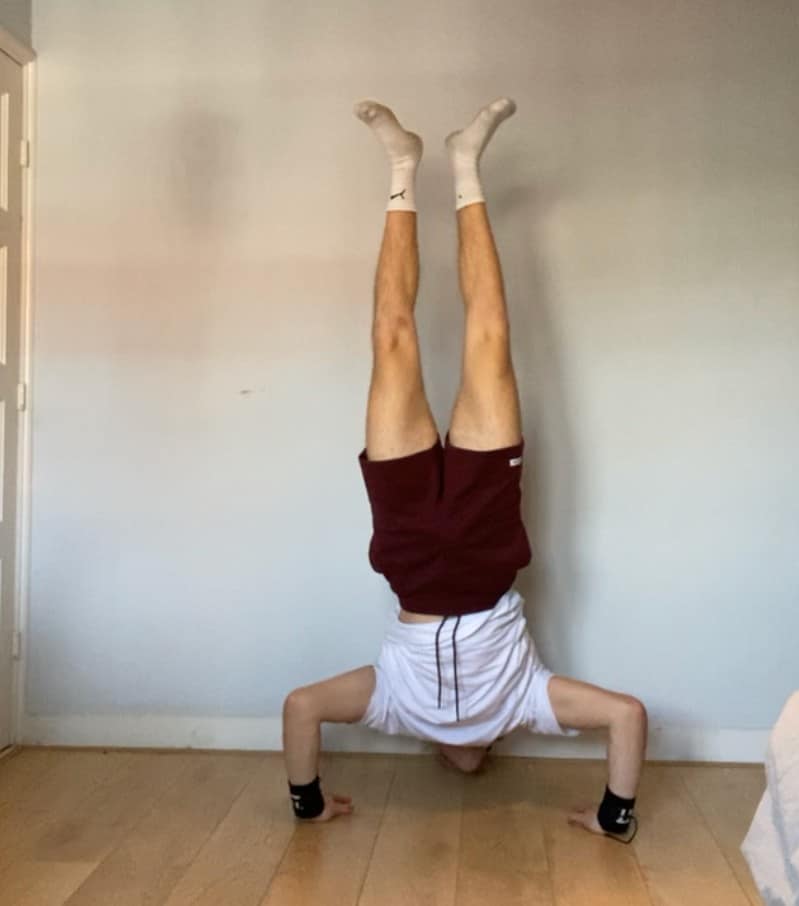
If you still can’t do a handstand push-up, you lack shoulder strength. A way to overcome this problem is by doing the negative handstand push-up variant. Once you are in a handstand position, you lower yourself in a slow and controlled motion. Get out of this position, jump back into a handstand, and lower yourself again. Repeat this process for reps.
Once you are comfortable with handstand push-ups against the wall, you are ready for the next step. Keep doing the handstand push-ups, but gradually try to move further away from the wall. You are now going to do handstand push-ups without standing against the wall. Make sure there is a small distance between you and the wall so that if you lose your balance, the wall can accommodate you. After a while, you will see that you will use the wall less and less. Until you eventually don’t need the wall anymore. You are now able to do a free-standing handstand push-up. And the more you practice, the more reps you will be able to do!
Additional exercises
Besides the training approach, I described above. There are some extra exercises you can do.
Handstand hold
By doing a couple of handstand-holds now and then, you will train your balance and shoulder strength. Both are crucial for the handstand push-up.
Pike push-ups
The pike push-up is basically an easier version of the handstand push-up. You perform the same motion. But with the pike push-up, you still stand on your legs instead of just your hands. Here is a video that demonstrates how to do the pike push-up.
Elevated pike push-up
To make the pike push-up more difficult, you can put your feet on an elevation, for example. This way, you change the lever of the exercise, which makes it a lot harder. Great for building that needed strength for the handstand push-up.
Dumbell shoulder press
The weighted version of the handstand push-up is the Dumbell shoulder press. An advantage of this exercise is that you can easily determine the difficulty. If you find it too difficult, you can take some weight off and vice versa. However, a disadvantage is that you need free weights for this exercise, not everyone has these. So if you own a pair of dumbells, I recommend you implement the shoulder press in your workout routine.
3 Tips To Progress Faster
- Grip strength, the handstand (push-up) is all about balance and strength. To balance yourself, you use your hand’s palms and fingers. Strengthening your grip with grip exercises like the palm extensions can make balancing a lot easier. Improve your handstand-time by throwing in a couple of these exercises in your routine every now and then.
- Shoulder and wrist mobility, the straighter your handstand, the easier it is. Improving shoulder and wrist mobility will make your form much straighter. Therefore, working on the shoulder, as well as, wrist mobility, can make it a lot easier to balance it. I suggest you work on mobility about three times per week.
- Frequency, working on your handstand push-up may very intensive. I do not recommend doing it every day. Your muscles need rest too. But 3-4 times per week will be alright. Be consistent, and you will be able to do the handstand push-up in no time!


